Deploying Umbraco 7 to GoDaddy
19 Nov 2016TL;DR – I have seen a number of posts on the Umbraco forum with questions about deployment to GoDaddy hosting provider. Many of those questions stayed either unresolved or the author would give up trying and switch to another hosting provider.
In this article, I share my personal experience with GoDaddy deployment. It is written as a deployment walk-through based on one of my Umbraco web projects. I hope that following these steps, you also succeed in deploying your website to GoDaddy (and, for that matter, many other hosting providers).
Why bother?
Some time ago, I was looking for a hosting provider for my the Umbraco website I was working on. GoDaddy seemed to be a good condidate. They provided the Web Deploy Publishing Settings file that I could use in my Visual Studio 2015 to publish my website to their cloud similar to publishing to Microsoft Azure. I have had experience with Azure one-click deployments, so I decided to give it a try.
Unfortunately, deployment in this classic fashion failed on me time after time. I tried to follow the standard Visual Studio 2015 Web Deploy procedure (sent to me by a friendly GoDaddy rep):
- Open your application in Visual Studio and go to
View > Other Windows > Solution Explorer. - Right click on the website name and select
Publish Website. - Click the
Import buttonand browse for the configuration file downloaded from Plesk. - Enter the primary FTP password for the Plesk hosting account.
- Click
Validate Connectionto confirm you have the correct settings.
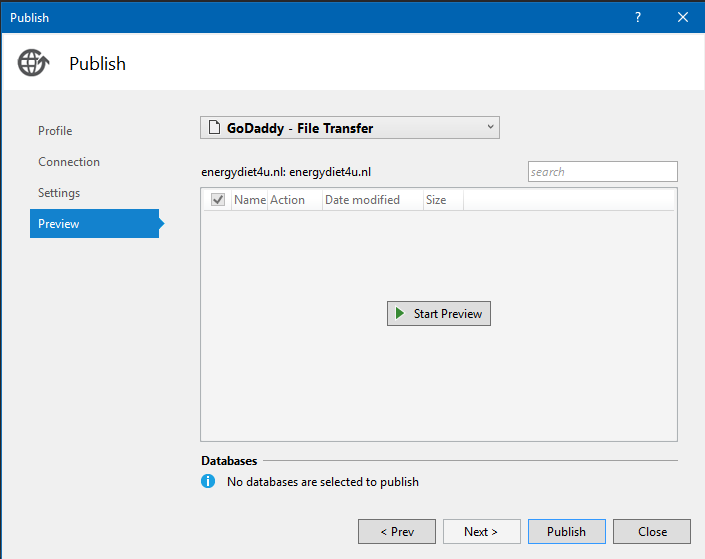
So far so good. The validation was successful. I would then start publishing by right clicking the project name in the solution and then on Publish. The usual dialog would appear and I would go through all the steps until Preview:
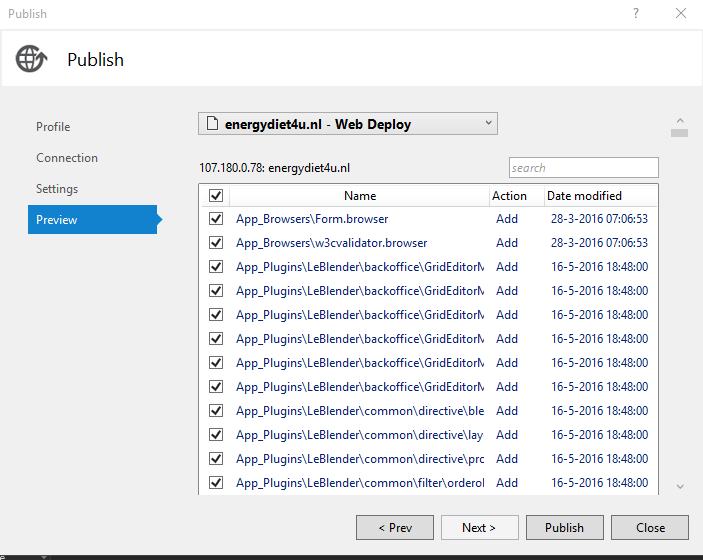
When I clicked on the Publish button at the bottom, I would get this error every time:
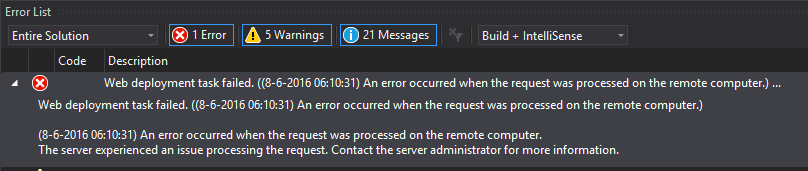
I must add that I would also get the same error when I clicked on the blue Preview database link although the connection itself would successfully validate.
I don’t need to explain that contacting GoDaddy as the server administrator brought nothing satisfying. They just pushed the responsibility back to Umbraco Service Desk.
At some point, I gave up on the classic “one-click” Web Deployment and started experimenting. Hereunder, I describe the solution I have found and still use every time. It only takes me about two minutes each time.
Assumptions
- Visual Studio 2015 Professional. You could probably also use its Community Editon, if it has SQL Server Object Explorer in it. You have to run Visual Studio as Administrator, which is necessary in order to be able to Publish.
- You have a working solution that shows the website when you run it e.g. with
Ctrl-F5. - If you don’t have or don’t want to use Visual Studio, you can deploy the files to GoDaddy via any FTP client, e.g. Mozilla’s Filezilla.
- IIS7. I use it to deploy locally first as my test deployment before publishing to GoDaddy. It is also handy if you are using both the Visual Studio and a separate FTP-client because you can copy (most of the) files of the local website to GoDaddy. (there are a couple of exceptions here)
Debug and Release
(Web) deployment can be done individually for each environment: e.g. Debug and Release. If necessary, one could create a new environment via Configuration Manager. For each environment, we need to configure the corresponding Web.config file.
Before deployment, it is necessary to stop the corresponding application pool and restart it again after deployment is finished.
Here are the examples of these files for Debug and Release.
DEBUG
<?xml version="1.0" encoding="utf-8"?>
<configuration xmlns:xdt="http://schemas.microsoft.com/XML-Document-Transform">
  <connectionStrings>
    <remove name="umbracoDbDSN"/>
    <add name="umbracoDbDSN"
      connectionString="Data Source=SERVER\INSTANCE;Initial Catalog=my_backup_db;User ID=sql_user;Password=sql_password"
         providerName="System.Data.SqlClient"
         xdt:Transform="SetAttributes"
         xdt:Locator="Match(name)"/>
  </connectionStrings>
  <appSettings>
    <add key="Umbraco.ModelsBuilder.Enable" value="false"
         xdt:Transform="SetAttributes" xdt:Locator="Match(key)"/>
    <add key="Umbraco.ModelsBuilder.EnableApi"
         xdt:Transform="Remove" xdt:Locator="Match(key)"/>
    <add key="Umbraco.ModelsBuilder.ModelsMode"
         xdt:Transform="Remove" xdt:Locator="Match(key)"/>
  </appSettings>
  <system.web>
    <compilation xdt:Transform="RemoveAttributes(debug)" />
  </system.web>
</configuration>
RELEASE
<?xml version="1.0" encoding="utf-8"?>
<configuration xmlns:xdt="http://schemas.microsoft.com/XML-Document-Transform">
  <connectionStrings>
    <remove name="umbracoDbDSN"/>
    <add name="umbracoDbDSN"
      connectionString="Data Source=godaddy_ip_address;Initial Catalog=my_godaddy_db;Persist Security Info=True;User ID=sql_user;Password=sql_password;TrustServerCertificate=False"
        providerName="System.Data.SqlClient"
        xdt:Transform="SetAttributes" xdt:Locator="Match(name)"/>
  </connectionStrings>
  <appSettings>
    <add key="debugWebErrors" value="false"
         xdt:Transform="SetAttributes" xdt:Locator="Match(key)"/>
    <add key="EnableOptimizations" value="true"
         xdt:Transform="SetAttributes" xdt:Locator="Match(key)"/>
    <add key="Umbraco.ModelsBuilder.Enable" value="false"
         xdt:Transform="SetAttributes" xdt:Locator="Match(key)"/>
    <add key="Umbraco.ModelsBuilder.EnableApi"
         xdt:Transform="Remove" xdt:Locator="Match(key)"/>
    <add key="Umbraco.ModelsBuilder.ModelsMode"
         xdt:Transform="Remove" xdt:Locator="Match(key)"/>
  </appSettings>
  <system.web>
    <compilation xdt:Transform="RemoveAttributes(debug)" />
    <customErrors defaultRedirect="GenericError.htm" mode="RemoteOnly" xdt:Transform="Replace">
      <error statusCode="500" redirect="InternalError.htm"/>
    </customErrors>
  </system.web>
</configuration>
IMPORTANT
The transformations should reflect the targets of deployment, not the sources.
Make sure that system.codedom segment at the end of the Web.config is empty:
<system.codedom>
<!-- All is removed between the 2 tags-->
</system.codedom>
When creating publish profiles, it may be necessary to add the AutoParameterizationWebConfigConnectionStrings key, otherwise Publish may fail. (See the FAQ section.) For the local deployment to the localhost, you may choose to create the database with the same name as on GoDaddy and with the same user. Then with local deployment, we can deploy the website and the database incrementally as necessary.
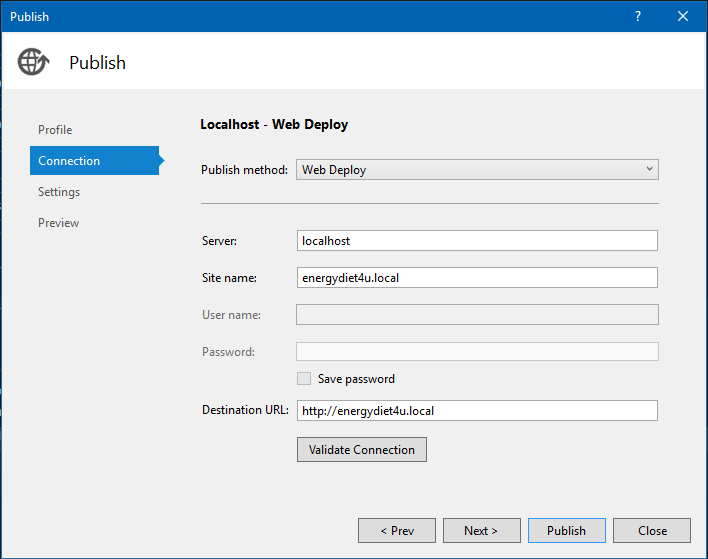
Here are my web deployment settings for local deployment:
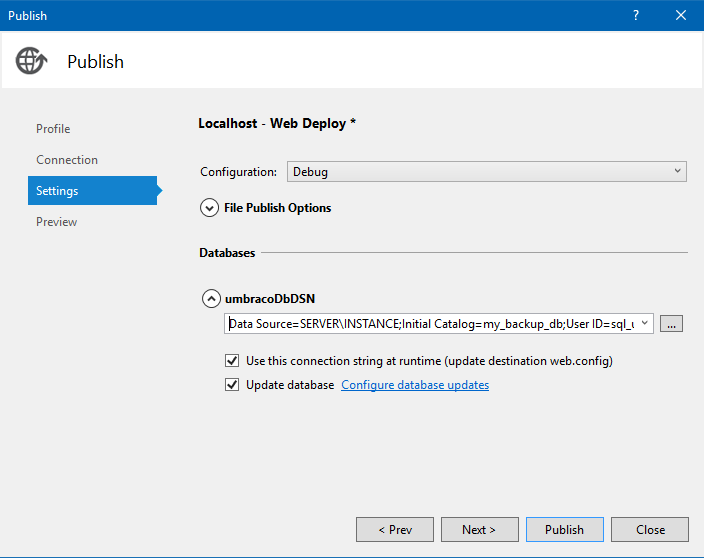
And these are the settings for the deployment to GoDaddy:

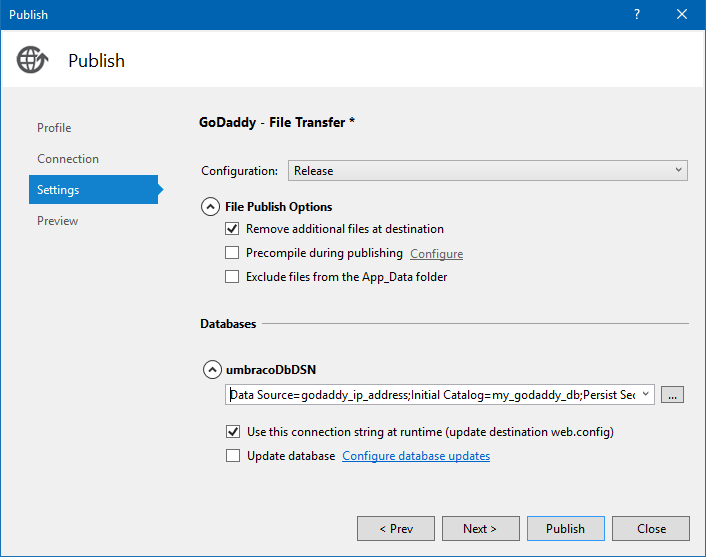
Notice that the Update database is checked only for the local deployment and not that of GoDaddy. That is because I am getting an unspecified error on the Preview database link in the Preview tab, and GoDaddy did not want to help me with this error. So, instead of doing it via Web Deploy, I am using the Data Comparison option of the SQL Server Object Explorer and then Update Target to push the changes to the website database on GoDaddy’s database server.
NB
It is still important though to have the proper database configuration in the
Web.Release.configfile. In this way, you don’t have to change the deployedWeb.configfile and the remote website can connect to its database.
Here is the checklist of settings necessary for the deployment to GoDaddy:
Deployment
IMPORTANT
Make sure that Web.config is UTF-8 without BOM encoded.
I usually use a separate Development database database for my Visual Studio Umbraco solution than the one for the local IIS website (Staging database). The Local Web Deployment seems to only synchronize the database schema changes and sometimes fails to synchronize data. I am not 100% sure if this is so indeed, and I have not searched this out. Feel free to skip the separate database data synchronization step below if you believe it does. It is called “Via data comparison, update the remote database”.
Local deployment
- commit all changes
- bump the label and label the production release
- via SQL Server Object Explorer do Data Comparison and update the the local madrus4u_ed4udb database
- switch to Release mode in Visual Studio
- open the local IIS7 Manager and stop the relevant application pool
- publish to the local IIS
- if applicable, synchronize the data (see further) between the Dev and Staging databases.
- in the local IIS7 Manager, start the relevant application pool
- open your local website and test the functionality of the local deployment
Deployment to GoDaddy
Preparations
- Start the Visual Studio as Administrator and open your solution
- Switch to the Release mode in your solution and build it to make sure everything is ok.
- If you have not done so, commit your changes to Git and label your release.
- download
.user.inifile from GoDaddy - prepare
Web.configfor GoDaddy - keep copies of
.user.iniandWeb.configseparately just in case (see FAQ section).
Stop the application pool in the Plesk panel
- Go to
Websites & Domainsand click onShow more. -
Find and click on the
Dedicated IIS Application Pool for Your Websitelink:
-
Click on
Stoplink:
-
The application pool stops and your website if off-line:
Via schema comparison, update the remote database
This step in only necessary from time to time, e.g. when you make changes in your models or after Umbraco version upgrade.
-
Schema compare...=> choosemaster database: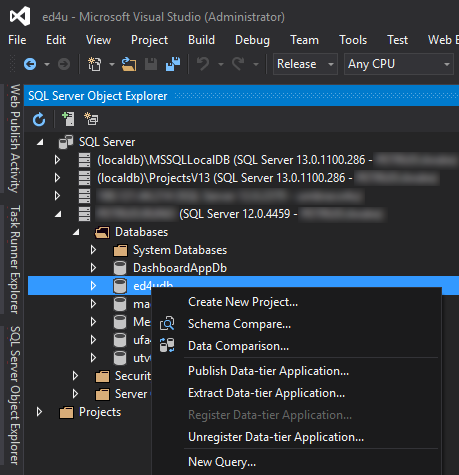
-
choose the target database in the right box:

-
click on
Comparebutton: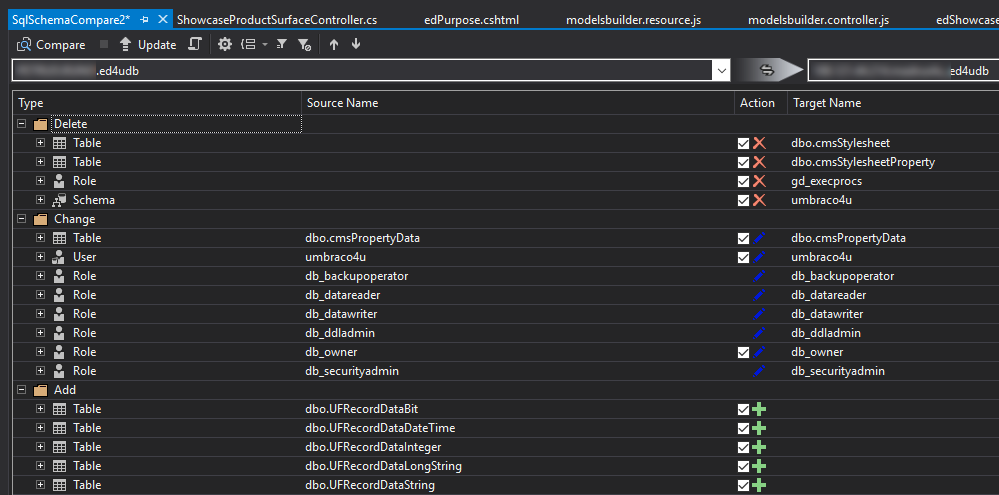
-
click on
Updatebutton and wait for success
Via data comparison, update the remote database
-
Data Comparison...=> choosemaster database: -
choose
remote databaseand clickFinish: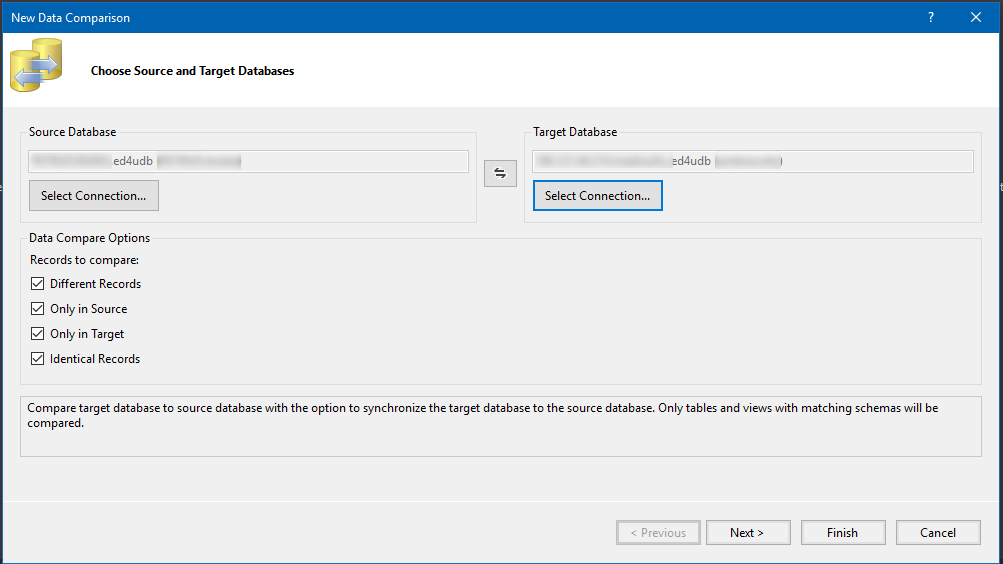
-
check the differences and click
Update Target: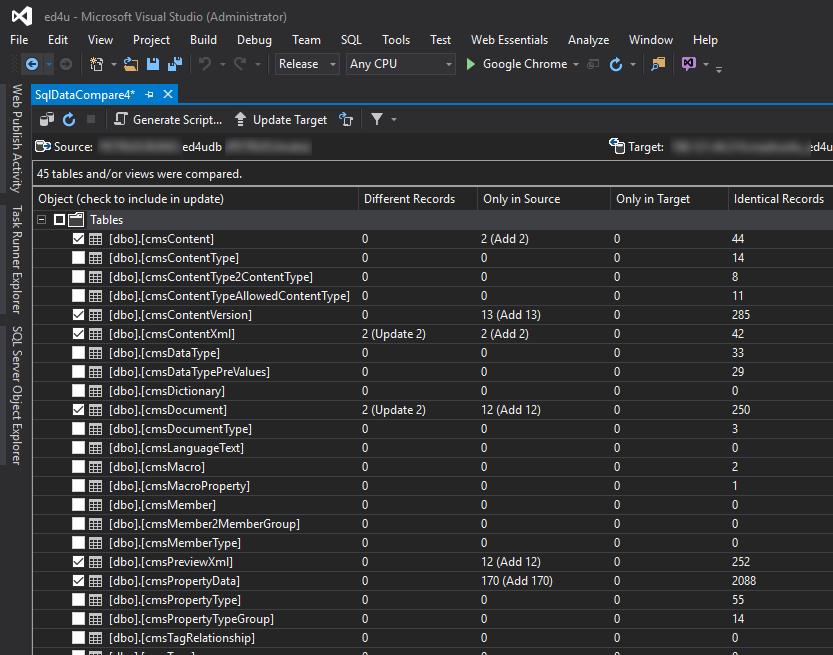
Click
Refreshcircular arrow and check if theDifferent Recordscolumn has all zeros. RunUpdate Targeta couple of times if necessary.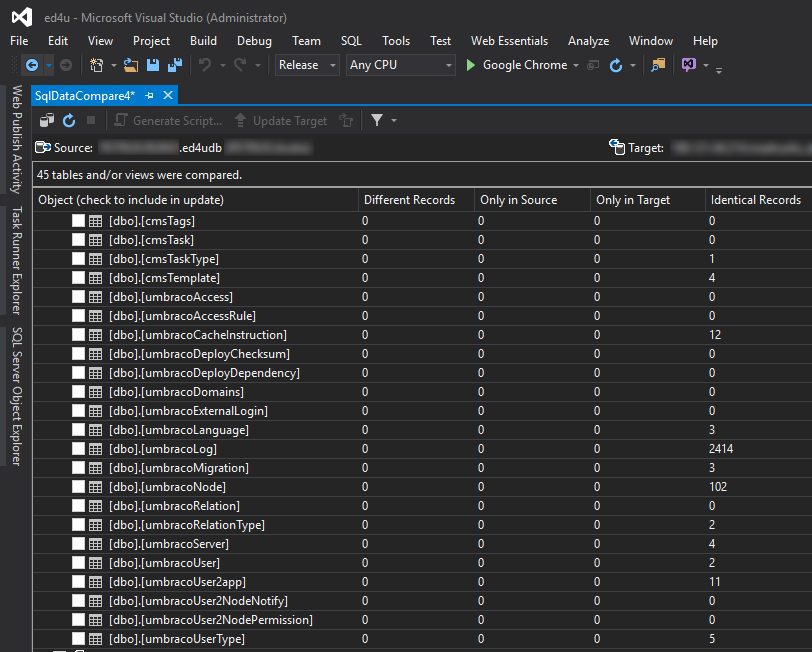
You may close now the
SqlDataComparetab.
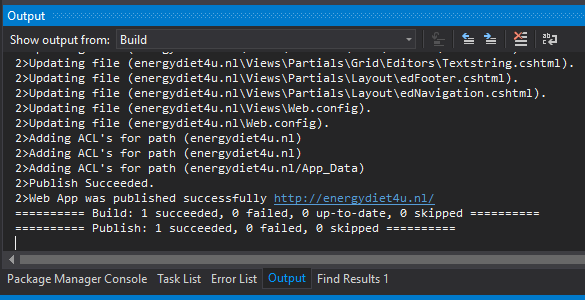
Publish the website (files only!) to GoDaddy
-
publish to GoDaddy (only the solution file, no database)
if everything went right, you will see success confirmation:
At the same time, you will probably see the browser start automatically and show
Service Unavailableerror message when opening your website URL: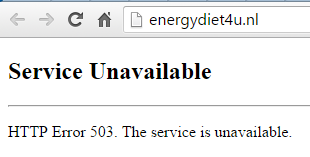
This is ok, as the
IIS application poolis still stopped. -
in Plesk go to
Filesmenu inWebsites & Domains:
-
click on
httpdocsand you will see the familiar Umbraco directory structure: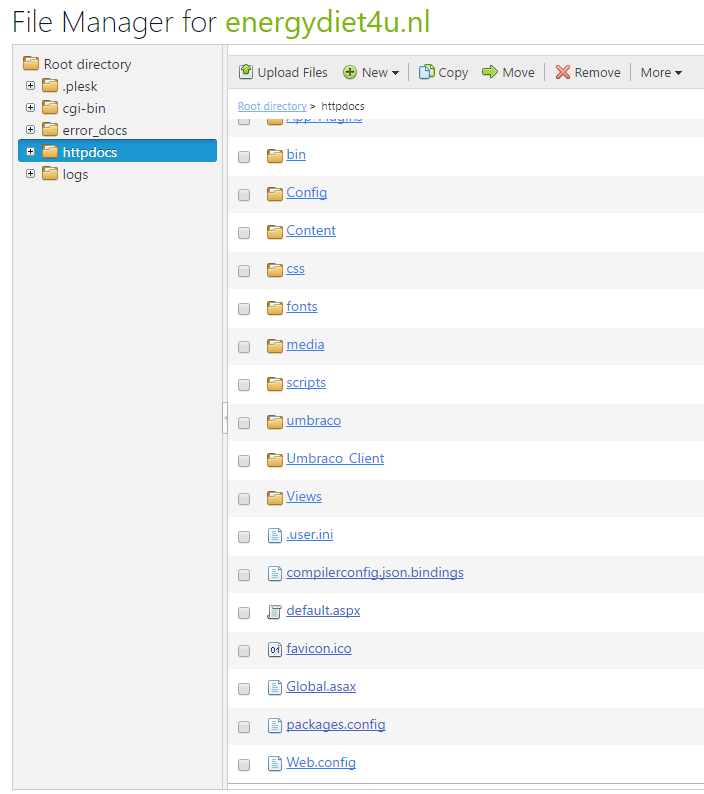
- check that you see your
.user.inifile and upload and replace viaUpload Filesmenu your productionWeb.config -
choose
App_Dataand hover with your mouse at the right end of your yellow bar. A small round button will appear. Left click on it and chooseChange Permissions: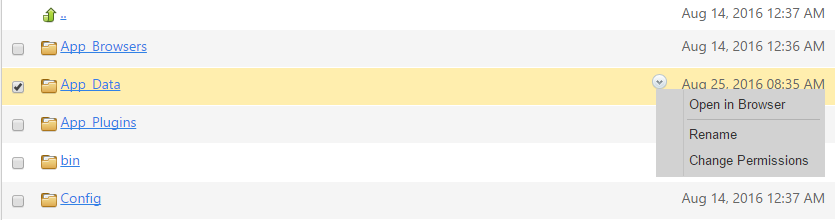
The
Change Permissionsscreen will now open. Tick, if not checked, bothAllow...andReplace permission entries...and click onPlesk IIS Worker Process Identity Accountin the left column: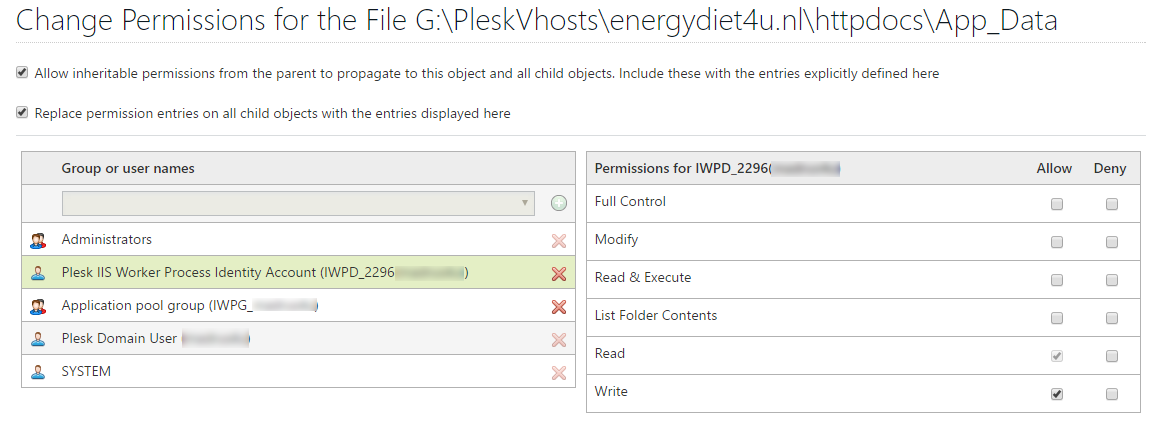
Notice that
Full Controlon the right is not ticked. -
Tick
Allowcheckbox onFull Control: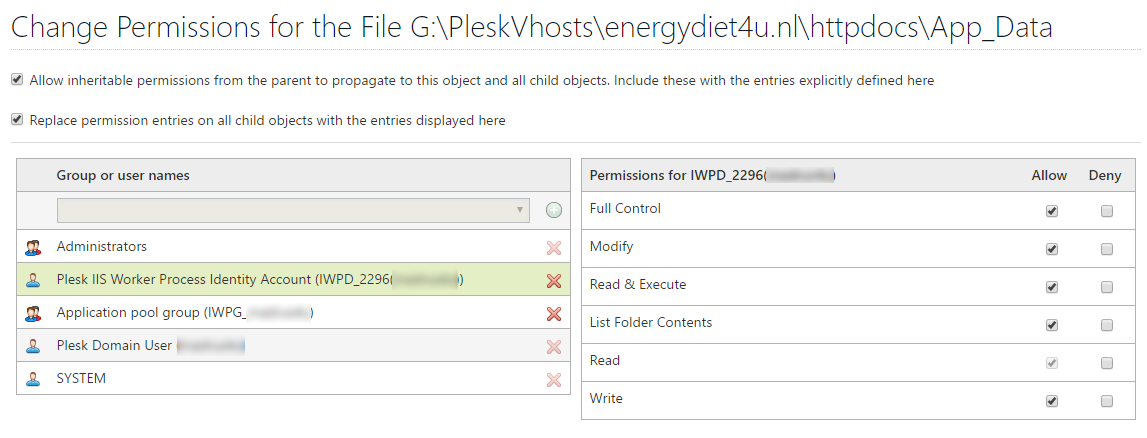
- Do the same for
Application pool groupand clickOKbutton. - Go back to
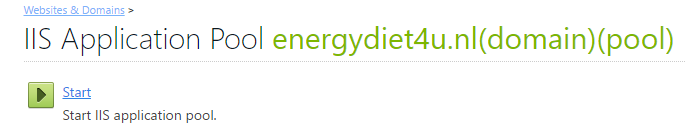
Website & Domainsand then toDedicated IIS Application Poolagain. -
Click now the
Startlink: - Congratulations! You are now up and running. Refresh the screen with 503 error. Don’t be surprised if the first time, immediately after starting or recycling the IIS application pool, you will have to wait - literally - maybe five minutes before the website loads. After that it loads in a breeze.
FAQ
When deploying after upgrade 7.4 to 7.5, I have got this error:

Fix
- check Web.config for differences with the backup master
Web.config- connection string (GoDaddy)
debugWebErrors = false
- start the application pool
- start the website, you will probably get the access rights errors
- get rid of all error messages, if necessary recycle the Application pool again
Could not find part of the path
Could not open Source file: Could not find a part of the path
J:\U\Ed4u\Ed4u\App_Plugins\LeBlender\Web.config;\App_Plugins\LeBlender\Web.config.
Fix
Find the deployment profile energydiet4u.nl - Web Deploy.pubxml
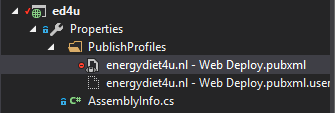
and add the following key to the PropertyGroup section:
<AutoParameterizationWebConfigConnectionStrings>False</AutoParameterizationWebConfigConnectionStrings>
Access denied when doing local (file) deployment
You probably forgot to start Visual Studio as Administrator.
Fix
Start Visual Studio as Administrator and try again.
Access denied when starting the local IIS website after deployment
Access rights on App_Data directory.
Fix
- Right click the
App_Datadirectory of the deployed website and chooseSecuritytab. - Edit permissions on the directory for
IUSRandIIS_IUSRSand give themFull control. If you don’t see them, give this to theUsersgroup. - Now, you should be able to start the website without permission errors.
Some further observations
-
most of the steps here are actually not GoDaddy specific (except the look-and-feel of course). I have used the same approach also with some other web hosting companies.
-
if you can’t deploy to your hosting provider directly from the Visual Studio (no access available) but your hosting provider has a file upload option in their control panel, you can first deploy locally to some directory. Replace the local Web.config with the one necessary for the remote web hosting environment, and then upload the whole directory. But don’t forget to synchronize the database data.
-
synchronize data has a second option,
Generate script.... You can use it on your remote site if you have no remote database access. -
synchronizing data as described hereabove makes it possible to synchronize changes made by content editors in the Staging or Production environment back to Development environment.
Final words
I would be very glad to know if this walk-though really helped somebody to deploy their website to GoDaddy. Please, leave your comment to let me know.
Any comments are more than welcome as I have never had a chance to discuss this document with anybody.